How to make motorcycle cables

Making your own throttle, clutch or brake cables can be really rewarding. It allows you to customize your bike in any way you want without having to buy expensive, factory cables. But if you don’t know the tricks of the trade, it can be more frustrating than rewarding. There’s a lot more than meets the eye when making your own cables so therefore this rather long monolog about making your own cables. Don’t worry, there are a few tips and tricks that are easy to memorize. So next time you’re attempting to make your own cables you will surely succeed.
- Measure measure, measure, then check your measurement and recheck it again before you trim the cable. You don’t want to make a rookie mistake by trimming the cable and end up with a cable that is either to long or to short. So it pays to be careful.
- Get the right parts before you start. Make sure you have the right solder, a good quality flux and some spare in case you screw up. Furthermore you’ll need a small butane torch or an old-fashioned soldering gun and cleaning fluid.
- Don’t overheat the cable or the fitting. Yes you need some heat to braze the cable ends to the cable. But if it gets red, the end of the cable will have to be trimmed off because it becomes brittle and you’ll have to toss it and start over.
- Preassemble your cable and check for size before you solder. Yup, measure it again to be sure the cable is the correct length. Better safe than sorry.
- Be careful not to fray the cut end of the cable. If you’re trying to cut the inner cable with an old wire cutter than changes are you will screw up the ends of the cable. So use a sharp/new wire cutter for cutting the cable. Of Course a dremel or other small power tool is a good alternative.
- Practice soldering. Practice practice and practice. Make sure you know how to solder and apply heat to the cable. So use a cut-off piece of the new cable or practice on an old cable.
Getting started:
The basic principles for making a cable apply to any kind of cable. So you can use these same techniques to build any type of cable on a motorcycle – whether it’s a brake, clutch or choke cable.
Basically there are two roads to travel when making your custom cables. The first one is to find a assembled cable that comes close to what your looking for. With some small modifications you can apply this to your project and you will save some time and money. Barnett is on of most well know fabricators of cables for Harley-Davidson motorcycles. They have a wide range of cables and probably something that comes close to what your looking for.
The second way is to build the cables entirely yourself. Besides a ton of complete cables, Barnett also has tons of parts that help you build your custom cables. Inner and outer cables that can be used for your custom cable and lots of different ways to adjust this cable to your controls.
-
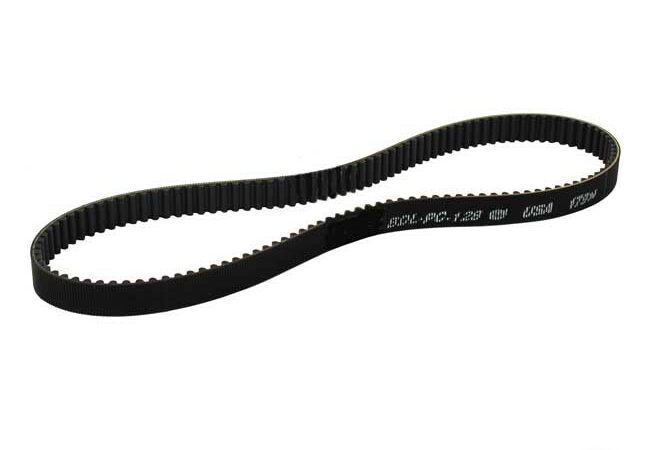
 Barnett outer wire cable, Throttle€ 65,95 incl. VAT
 -
Barnett inner wire cable, Throttle€ 27,95 incl. VAT
-
Barnett inner wire cable, Clutch/Brake€ 4,70 – € 34,40 incl. VAT
-
Barnett outer cable, Clutch/Brake€ 9,95 – € 79,00 incl. VAT


-
Barnett throttle cable elbows€ 13,95 incl. VAT
-
Barnett throttle cable junction 4-1€ 13,95 incl. VAT
-
Barnett throttle cable junction 2-1€ 9,95 incl. VAT
-
Barnett Cable Adjuster, Clutch€ 12,95 incl. VAT


The best place to start is with your old cable that doesn’t fit your required build or is in need of replacement. If it’s intact and you need an exact replacement of the old cable, then having the old cable will provide you with a lot of critical information. With a few quick measurements, you’ll know the overall length of the cable, the outer cable length and the free length. You’ll also be able to determine what components you need to build the cable, for example, fittings, elbows, adjusters, etc. If they’re in good shape, you might be able to grab some fittings from the old cable as well.
It’s also helpful to know the parts of a cable:
- The inner cable is the longest piece of cable. In this day and age, it should be braided stainless steel. You don’t want a cable that can rust on you. This is the piece you will solder your fittings to.
- The outer cable (sheath) protects the inner cable from damage. Good cables are lined with Teflon. This creates much less friction between the cable and the sheath. There’s also less of a chance of the cable failing.
- The elbow is sometimes used to keep a cable from bending the wrong way or kinking. The elbow can be found attached to the top of the carb or where the cable enters the throttle assembly. Elbows are often fitted with cable adjustment nuts for use in marginally lengthening the cable.
- The cap is fitted over one, or in some cases, both ends of the cable to keep it the plastic coating from pealing back.
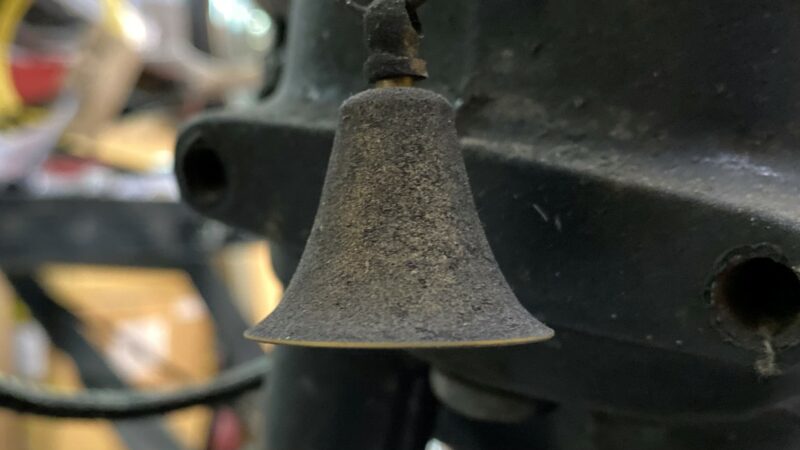
- Adjusters can be fitted in the middle or either end of the cable. On the BMW cable pictured above, the cable adjuster is on the carburetor end.
- End fittings come in a variety of shapes and sizes. The most common are ball fittings, barrel fittings, nipples and pears – and they come in a wide variety of sizes. The image to the right shows a fitting kit from Niche Cycle.
-
Barnett Cable End€ 0,95 incl. VAT
-
Barnett Cable End, #N35€ 0,95 incl. VAT
-
Barnett Cable End, #63F€ 1,00 incl. VAT
-
Barnett Cable End, #619F€ 1,20 incl. VAT


Heat Source
So enough about the basics. Time to get started with your custom cables. First of all is a good heat source to solder on your fittings. The quickest way is with a small torch. These will heat up your cable with lightning speed but also introduce the risk of overheating the cable. Once you’ve overheated the cable, the overheated part becomes useless and has to be cut of. An alternative is a old fashioned heavy duty soldering gun. These will take a little bit longer to heat up the cable enough to get the solder flowing but the changes of overheating are almost reduced to none. Don’t try this with small Weller torch because it won’t produce enough heat.
Solder and Flux
The next thing is finding a type of solder and flux. If you buy a cheap or wrong flux for your required cable you won’t get the right flow and or bond between the cable and the fitting. Don’t cheap out on this and take a short cut or you’ll waste the cable. Flux performs three important functions: It chemically cleans metal surfaces to assist in the flow of filler metals over base metals (in our case, solder), it helps transfer heat from the torch to the metal surface and it assists in the removal of metal oxides which prevent bonding. Go to your local hardware store and get some proper advice on a good solder and flux. I’m not a chemist but what i do know is that the standard flux/solder for your copper pipes in the kitch won’t hold up when your applying your brakes on full speed.
-
Barnett Cable Adjuster, Clutch€ 12,95 incl. VAT
-
Barnett Rubber boot, Clutch€ 3,95 incl. VAT
-
Barnett Solder fitting, brass 6.1mm€ 0,80 incl. VAT
-
Barnett Solder fitting, brass 12.7mm€ 0,80 incl. VAT


Time for some action, how to solder
Assuming you’ve checked, double checked and pre-assembled your cable, than it’s time to make it permanent and solder the fittings. The flux can clean a lot of grease/filth on your cable but it’s better to use a good degreaser like brake cleaner to start with. Make sure it’s a type of cleaner that isn’t highly flamable because that will cause a lot of other problems :).
Step-by-step soldering
- Clamp or place the cable where can sit at least a few inches above your working surface. You don’t want to catch anything on fire! You’ll also need to be able to heat the cable evenly from top to the bottom. If you’re using an open flame torch, make sure there are no flammable chemicals sitting around.
- Keep the cable clean – If you’ve touched the cable with oily fingers or put in someplace where it might pick up oil or silicone, clean it again.
- Slide your clean end fitting onto the cable. carefully slide the fitting on the cable and be sure you don’t contaminate the cable again with your greasy hands.
- Dab the cable with a few drops flux using a Q-tip. Or, if you have a big enough bottle, you can dip the cable end into the bottle. Don’t use your finger to spread the flux on the cable. Your fingers retain body oils that will make the cable reject the solder, and you don’t want that stuff on your fingers anyway. It is toxic and poisonous.
- Heat the cable slowly and carefully. Start with the flame about 15 cm away and move in slowly heating only the cable. Do not expose the nipple or fitting to direct heat and be careful not to overheat the cable – it can happen fast! If the cable glows red or becomes sooty, you will have to trim both the outer and inner cable and start over (that’s if you have enough room left on the cable). That’s why I suggest you practice on a bit of the leftover cable first. Ideally, you should heat the cable to around 180 degrees. Do not heat the nipple. Observe what happens to the flux. As it starts to bubble, touch the tip of the solder to the nipple and the flux should immediately draw the solder in. Let the solder cool completely for a few minutes before you attempt to touch it.
- Test the cable. With the cable completely cooled, grab the end of the fitting with a vice grip. Remember these fittings are soft brass so don’t clamp so tightly that you’ll misshape it! Give the fitting a good tug. If it stays on, you’ve successfully soldered the cable and you’re ready for your next one.
Text by RJC-Choppers and a little help from http://www.vintagebikebuilder.com/building-cables.html