How to check your generator

How to check your generator
In my search for information about a 12V generator i ‘ve found several resources that gave me some information about how you should/can check your generator.
What i really missed was one simple toubleshooting guideline.
So here it is.
To check if your bike is charging the way it supposed to, you start by doing the following.
With the engine turned of you measure the current on your battery with a DC Voltmeter . It should read about 12.4 Volts.
If it’s below 12 Volt you should charge your battery, refill it or replace it. Depanding on the state of the battery.
To check if the charging system is working properly and with the wires of the Voltmteter still connected, you should see a decrease on the voltmeter when you start the engine followed by a recovery to 12+ Volts once the engine is running. When you let the engine idle to about 2000 Rp, you should see an incline to 13.5/14 Volts. This indicates the charging system is working properly. If the current is above 14,5 Volts your regulator is broken and you should replace it. If the current stays the same or even drops a little it means we have to do some research. Because it/s near impossible tot check a regulator and you have probably checked the wiring, the easiest way to troubleshout is by checking the generator.
Many manuals say you should/can leave the generator on your motorcycle while testing. I on the contrary say you should remove it and test it on your work bench.
The generator is mounted with only two bolts on the cam side and two wires on the other side. By removing it you are sure there is nothing else influencing the generator and you can be certain your test is legit.
The first test is to see if the generator turns freely. If you feel any resistance whil turning it you probably have to replace the bearings of your generator. A other possibility is that the armature is touching the field coils. This is something we will discover later on.
Next up is to turn your generator into a electric motor. With the generator on the work bench you connect a jumperwire from the F terminal to the generator case. Than connect a jumperwire from the A terminal to the + on your battery. The last wire is a jumper wire from the F terminal to the – on your battery. Once connected the generator should turn like an electric motor. If it turns smootly you know your generator works and your problem is probably a damaged regulator. The only thing we don’t know is the output voltage the generator is producing. To test this you have to install the generator, connect it, polorize it and test it like your manual says. It should deliver about 35 Volts at 2000 Rpm.
If this this value is also correct you know for sure your regulator is busted.
If the generator doesn.turn try to polarize it. You can do this by connecting a jumper wire from the A terminal to the + on your battery en momentarily connect a jumperwire between te F terminal and the – on your battery..
If the it still doesn’t turn try to feel, with the wires connected, if you’re able to turn the armature. If it’s locked into place with the wires connected and runs freely without the wires you have a shortcut in the generator and it could mean several things.
First is to check the wiring from the field coils. To do this we have to dismantle the generator by removing the bearing housing on the connector side. ( See manual ) Once removed you should see someting like this.

Now we can disconnect the wire from the fiel coils to the brushes and remove the brush mounting plate. While were the check if the brushes run freely in their casings and if they are at least 12 mm long. If they are any shorter replace them.
With this removed you can remove the housing, incl field coils, from the armature. When you now measure the resistance ( Ohm ) on the field coils you should see about 3/5 Ohm between the A and F terminal and no resitance between the casing and one of the terminals. If you see any resistance between a terminal and the casing or see no restistance between the two terminals your field coils need replacement.
If all vallues are good make sure the wire connceted to the brushes is coming from the A terminal.If so your casing/field coils are in good order.
To test the armature you need a Growler. only oldtimer freaks or old garage still have these so we need to find an alternative. By eliminating everything else we can make sure the armature is working or busted. The only check we can do without a Growler is te see if we measure resistance between the collector ( the bronze part were the brushes touch ) and the magnets between the coils. You should measure no resistance. If you do see any resistance your armature is probably broken..
Last step is to find out if the armature is touching the field coils. Best way to do this by assembling the generator completely with a small addition. Put some cardboard between the brushes and the collector or remove the brushes. The last option works best because you can test in several postions.
With the generator assembled and still on the bench we now are going to test the field coils again. If there is any resistance between one of the two terminals and the housing we have a shortcut that probably is caused by the blocks that hold the field coils touching the armature. You can file down the these blocks so the armature wont touch the field coils. Make sure you clean the generator before reasembly.
When al of the above is correct we should now have a working generator that we can test like an electric motor again.If the generator now turns we have fixed our problem and we should have a working charging system.
Reassemble, polarize ( When connected momentarily run a jumperwire from the + terminal to the A terminal ), start engine en check if it’s charging.
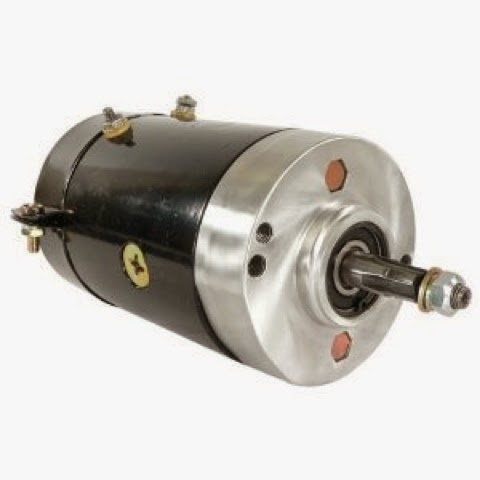
When you need to replace a regulator i advice to use one like show below. It’s mounted directly on the generator so it will recieve maximum cooling and also has two indicator lights. Red for idle to show the system is good to go en green to see it charges when you run it at a higher Rpm